(Espa/Eng) Tutorial de una hermosa pulsera en macramé, inspirada en Mago de fuego Khazi , concurso de arte 301/ Tutorial of a beautiful macramé bracelet, inspired by Khazi Fire Wizard , art contest 301
¡Bienvenidos a mi blog!
Welcome to my blog!

Buenas noches queridos amigos de esta linda comunidad #Diyhub, feliz Martes, Dios les bendiga. Muchas bendiciones. Me alegro que falte poco para las vacaciones, soy docente. Cuando llega el mes de Julio ya el cansancio es grande .
Good evening dear friends of this beautiful community #Diyhub, happy Tuesday, God bless you. Many blessings. I'm glad it's not long before the vacations, I'm a teacher. When the month of July arrives the tiredness is already great.
Hoy quiero mostrar a través de un tutorial , cómo hacer una linda pulsera tejida en macramé, de color morado, inspirada en el Mago de Fuego Khazi , personaje del juego @Splinterlands
Está pulsera de color morado con dos mostacillas amarillas , se realiza con varios nudos en macramé. Es fácil de hacer. Sirve para regalar a un ser querido . La pueden usar tanto hombres como mujeres.Sin más que decir ,.vamos a los materiales que se utilizan para su realización.
Today I want to show through a tutorial, how to make a nice bracelet woven in macrame, purple, inspired by the Fire Wizard Khazi, character of the game @Splinterlands
This bracelet is easy to make.
This purple bracelet with two yellow beads is made with several knots in macramé. It can be worn by both men and women, without further ado, let's go to the materials used for its realization.
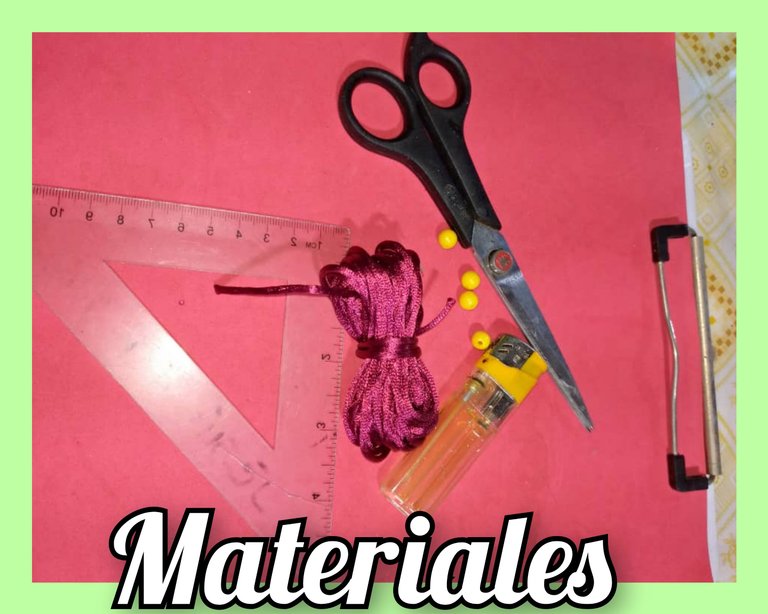
Materiales que se necesitan para la realización de la Linda pulsera en macramé:
- 3 metros de Hilo, cola de ratón ,color morado .
- 4 mostacillas amarillas.
- Tijera.
- Yesquero.
- Regla
- Carpeta con gancho.
Materials needed for the realization of the beautiful macrame bracelet:
- 3 meters of Thread, mouse tail ,purple color .
- 4 yellow beads.
- Scissors.
- Tinder.
- Ruler.
- Folder with hook.
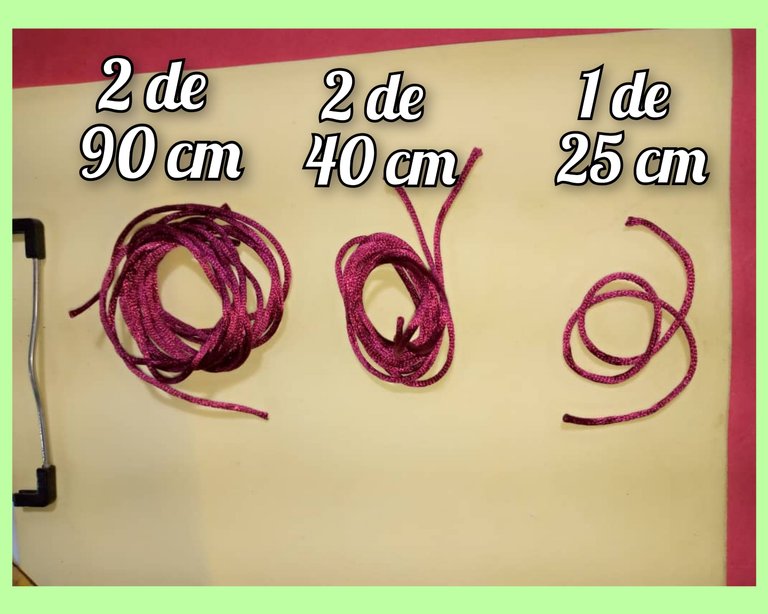
Pasos para la realización de la pulsera:
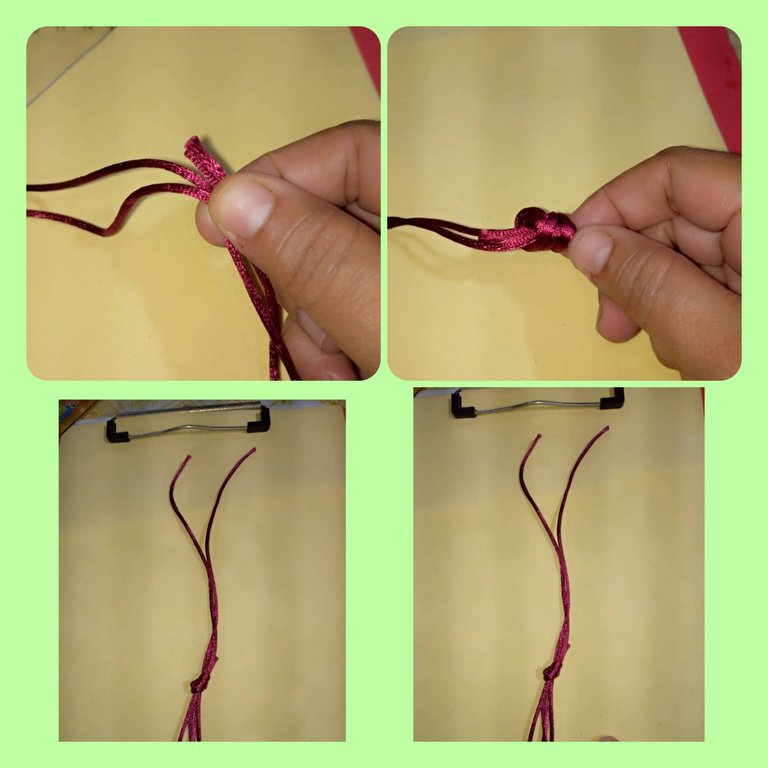
- Lo primero que haremos es tomar el hilo cola de ratón y la regla para medir el largo del hilo.
- Medir 2 pedazos de hilo de 90 cm.
- 2 pedazos de 40 cm y un pedazo de 25.
Steps to make the bracelet:
- The first thing we will do is take the mouse tail yarn and the ruler to measure the length of the yarn.
- Measure 2 pieces of yarn of 90 cm.
- 2 pieces of 40 cm and a piece of 25 cm.
- Agarramos el hilo de 40 cm , con la regla medimos 13 cm, esto es lo que dejaremos de la pulsera. Luego tomamos el hilo cola de ratón de 90 cm. Hacemos un nudo sencillo, dejando los 13 cm .
- Después de haber hecho el nudo sencillo ,procedemos a realizar nudos planos ,pero de un solo lado . Hacemos todos los nudos del lado izquierdo.
- Cuando hayamos realizado 10 nudos planos de un solo lado, colocamos una mostacilla, color amarilla, pero antes quemamos la punta de la cola de ratón para que pueda entrar con facilidad en la mostacilla.
- We take the 40 cm thread, with the ruler we measure 13 cm, this is what we will leave of the bracelet. Then we take the mouse tail thread of 90 cm. We make a simple knot, leaving the 13 cm.
- After having made the simple knot, we proceed to make flat knots, but only on one side. We make all the knots on the left side.
- When we have made 10 flat knots on one side only, we place a yellow bead, but first we burn the tip of the mouse tail so that it can easily enter the bead.
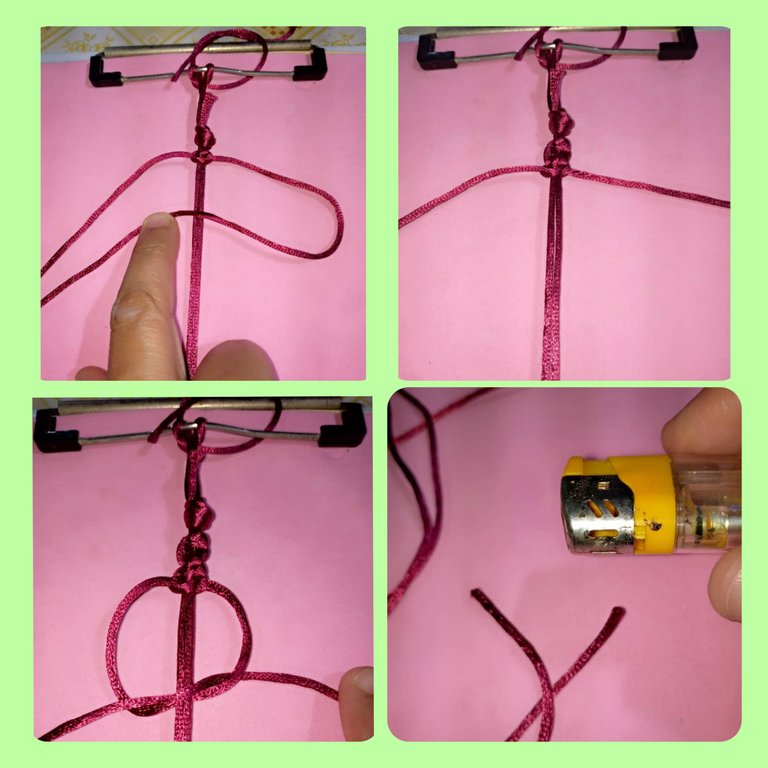
- Nudos planos: tomamos el hilo de la izquierda, lo pasamos por sobre los hilos centrales,hacia la derecha, en forma de P, luego el hilo de la derecha lo pasamos por debajo de los hilos centrales y sale por arriba del hueco de la P.
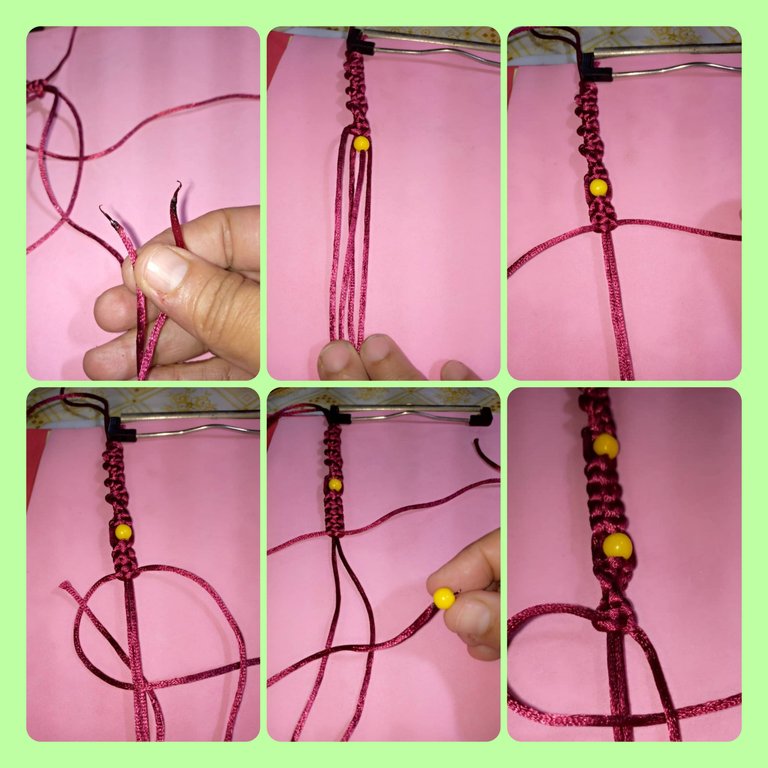
- El nudo plano de un solo lado , se hace de un solo lado, podemos ver qué de un solo lado va tomando una forma distinta que va quedando como forma de onda.
- Después de introducir la mostacilla amarilla , hacemos 5 nudos planos normales.
- Metemos la otra mostacilla y hacemos 10 puntos planos de un solo lado.
- Recortamos los hilos sobrantes con las tijeras. Y sellamos las puntas con el yesquero.
- Para hacer la tranca de la pulsera hacemos el punto barril.
- Tomar el hilo de 25 cm, doblar por la mitad , colocar el doblez sobre los cuatro hilos de la pulsera.Comemzar a enrollar por los hilos hacia la parte de atrás, luego el hilo de la izquierda meterlo por debajo e introducirlo por el hueco y del otro lado jalar hasta que el nudo quede bien.
- Flat knots:** we take the thread on the left, we pass it over the central threads, to the right, in a P shape, then the thread on the right we pass it under the central threads and comes out above the hollow of the P.
- The one-sided flat knot** , is made on one side only, we can see that from one side it takes a different shape that will remain as a wave form.
- After introducing the yellow bead, we make 5 normal flat knots.
- We introduce the other bead and we make 10 flat stitches on one side only.
- Trim the excess threads with the scissors. And seal the ends with the tinder.
- To make the bracelet's clasp, we knit the barrel stitch.
- Take the 25 cm thread, fold it in half, place the fold over the four threads of the bracelet, start winding the threads towards the back, then the thread on the left side put it underneath and introduce it through the hole and pull the other side until the knot is tight.

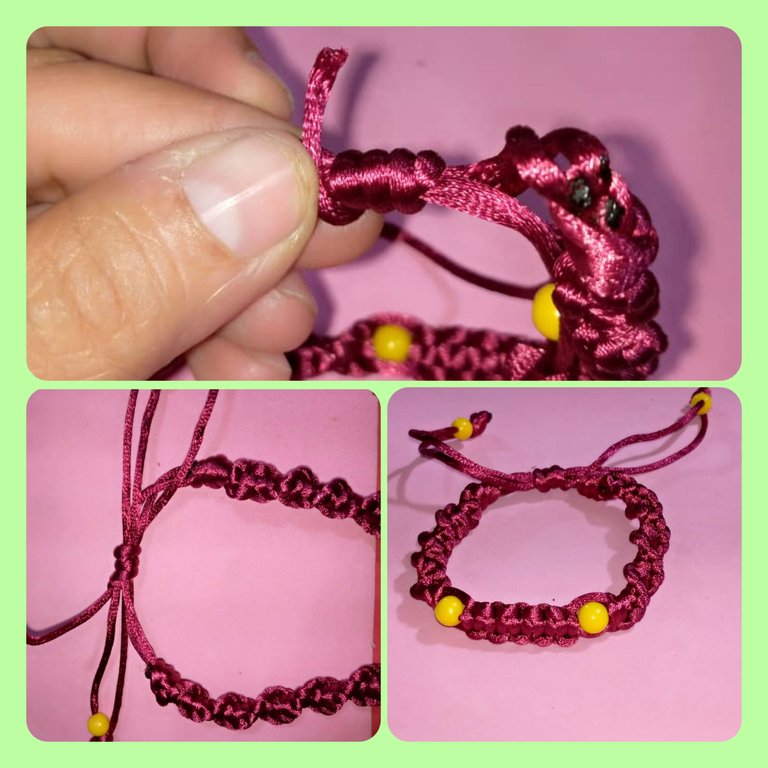
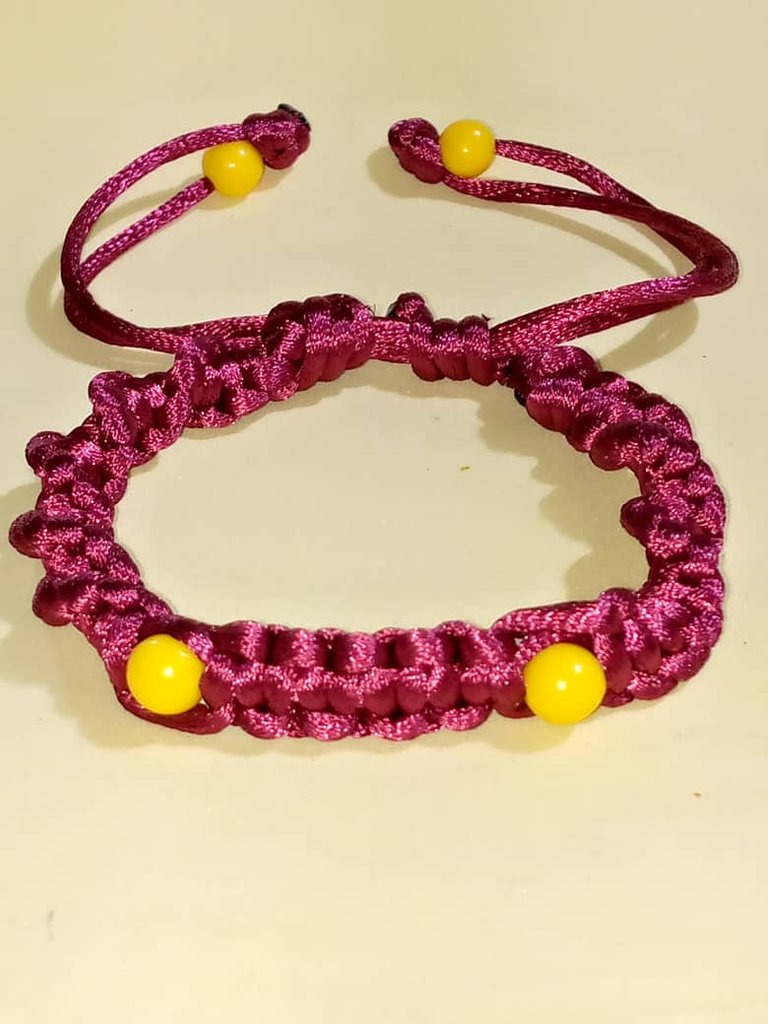
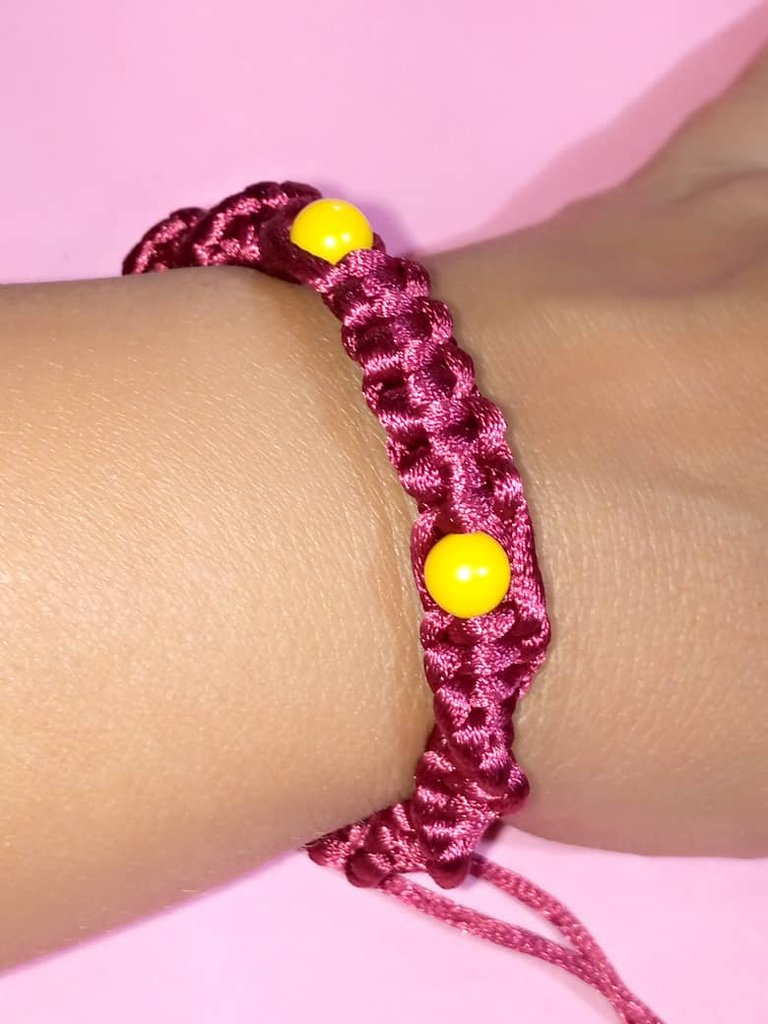
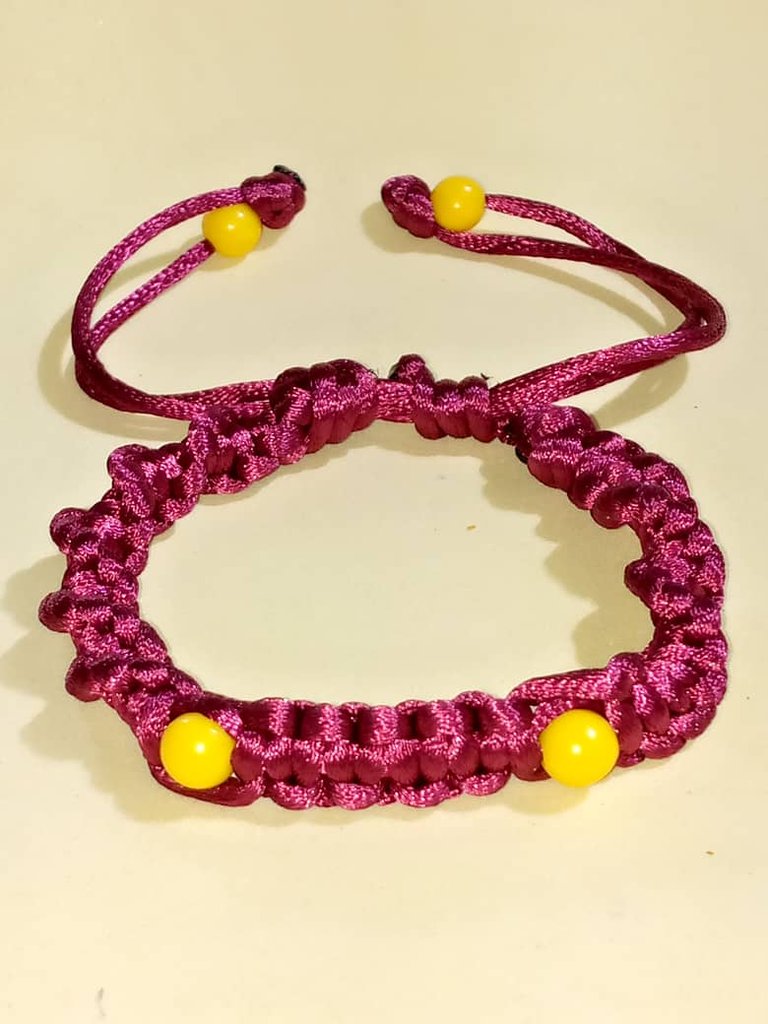
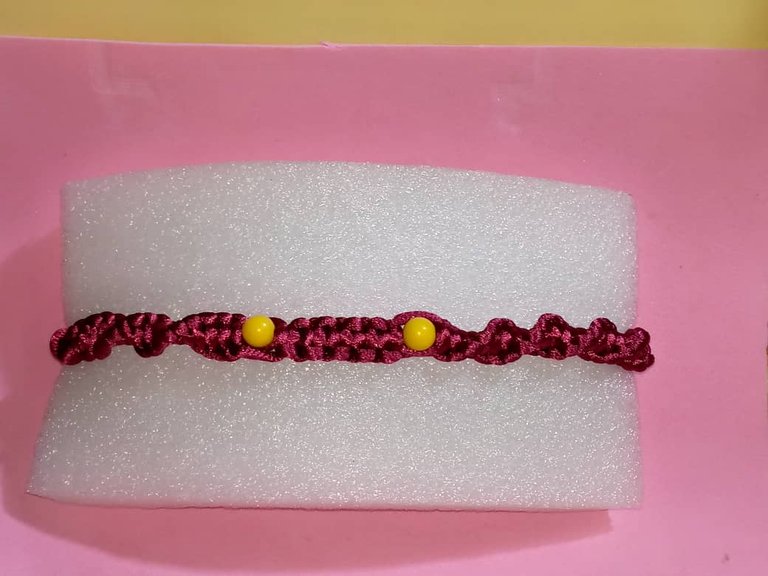
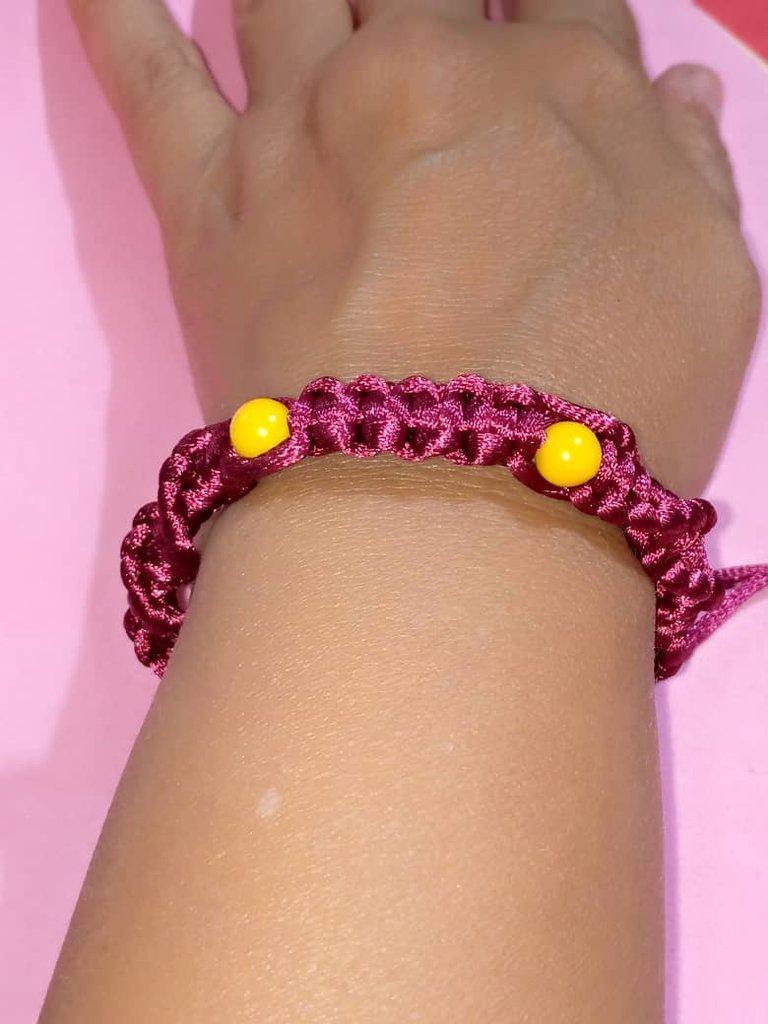
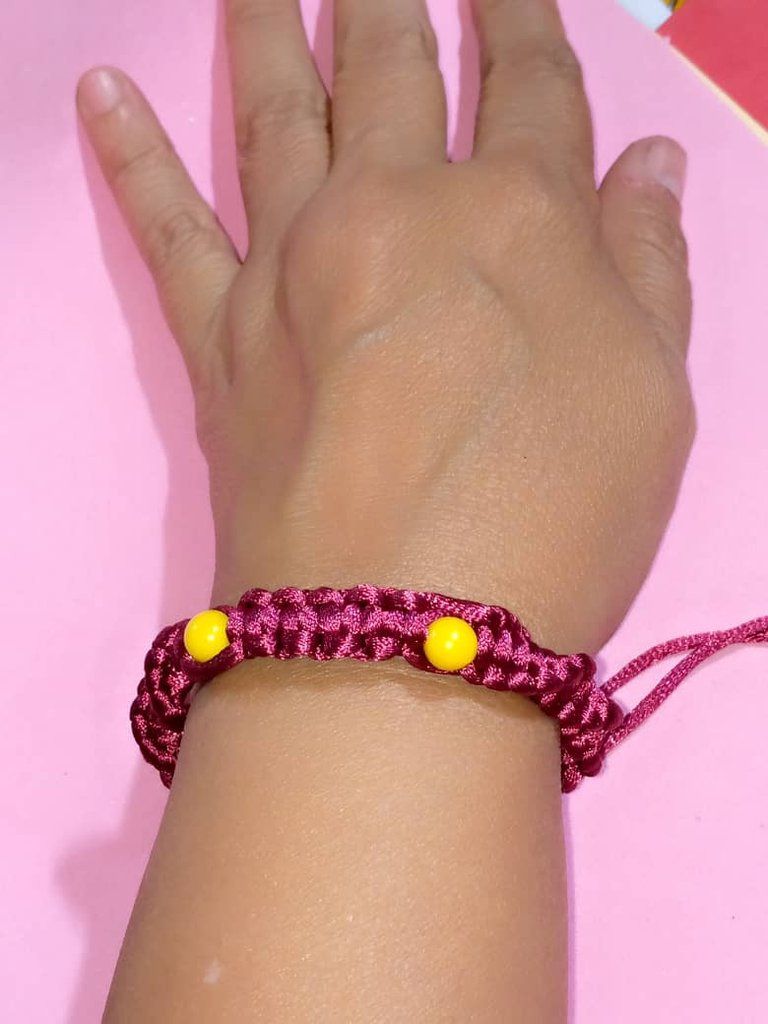
Aquí el resultado final de la linda pulsera tejida en macramé , inspirada en el Mago de fuego Khazi.
Here is the final result of the beautiful bracelet woven in macramé, inspired by the Fire Wizard Khazi
Gracias por leer mi post. Las fotos son mías, tomadas con teléfono INfinix,editadas con incollage y traducidas con Deepl.
Thanks for reading my post. The photos are mine, taken with INfinix phone, edited with incollage and translated with Deepl.
Gracias @splinterboost . Saludos.
Te quedó muy bonita ☺️
Me gusta el color y la forma que le diste a la pulsera 🧡
Si , amiga @naath quedó hermosísima. Gracias por comentar mi post. Saludos.
Hola @josdelmi, que linda pulsera, me gustó la combinación de colores, las mostacillas amarillas se ven espectaculares. 🌷💐🌸🌻🌺
Feliz miércoles!
!DIY
Gracias amiga @belkyscabrera . Muchas bendiciones 🤗
You can query your personal balance by
!DIYSTATSGracias @diyhub , bendiciones.
A simple to make, yet beautiful bracelet. Bravo
Me alegra que le guste @diyhub . Saludos
muy bonito, el color esta genial!
very nice, the color is great!
Gracias amiga @yasmarit . Saludos.
This exquisite baselet woven in yarn looks wonderful. I love bracelets with sticks. Great experience