[ESP-ING] Bracelet Nomos || Splinterlands Art Contest Week 300
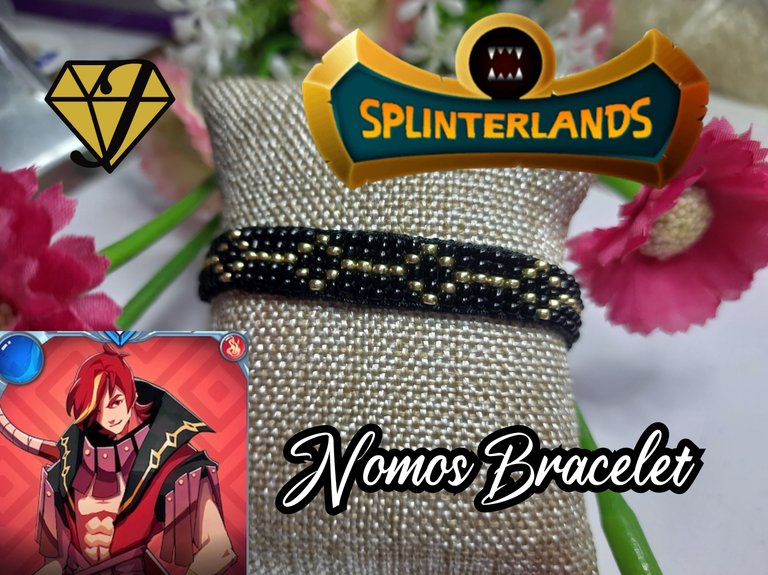


Un saludo, mi gente maravillosa de @jewelry hoy vengo a participar en el concurso #300 de Splinterlands, para ello me inspire en un fan art y realice unos "Pulsera" de nuestra carta, inspirado en el personaje de nombre "Nomos" este fan art me ha inspirado para realizar este brazalete conmla tecnoca de miyuki, me he inspirado como tal en su traje las lines con los rombos y de allí pude hacer el diseño para la pulsera.
Nomos, es un invocador de splinter de fuego, cuyo costo de maná es igual a 5 puntos, oor otra parte, es uno de los que permite utilizar el modo tácticas de invocador, donde te permite elegir, si aplicar un debuff de reducir en 2 puntos el daño mágico de 2 monstruos enemigos u otorgar la habilidad “Dispel” a 2 monstruos de nuestro equipo.
Para este Fan Art utilice una técnica de miyuki, para darle un toque especial, con la cual se puede realizar muchas cosas, este tutorial lo disfrute mucho pues es sencillo de realizar, además tenia mucho tiempo que no lo hacía, les invito a ponerse manos a la obra mis queridos creativos. Y ver este paso a paso.

Greetings, my wonderful people of @jewelry today I come to participate in the contest #300 of Splinterlands, for this I was inspired by a fan art and made a "Bracelet " of our card, inspired by the character named "Nomos " this fan art has inspired me to make this bracelet with the miyuki technique, I was inspired as such in his suit the lines with diamonds and from there I could make the design for the bracelet.
Nomos, is a fire splinter summoner, whose mana cost is equal to 5 points, or on the other hand, is one of those that allows you to use the tactics mode of summoner, where you can choose whether to apply a debuff to reduce by 2 points the magic damage of 2 enemy monsters or grant the ability "Dispel" to 2 monsters of our team.
For this Fan Art use a technique of miyuki, to give it a special touch, with which you can do many things, I enjoyed this tutorial because it is simple to perform, also had a long time that did not do it, I invite you to get down to work my dear creative. And watch this step by step.
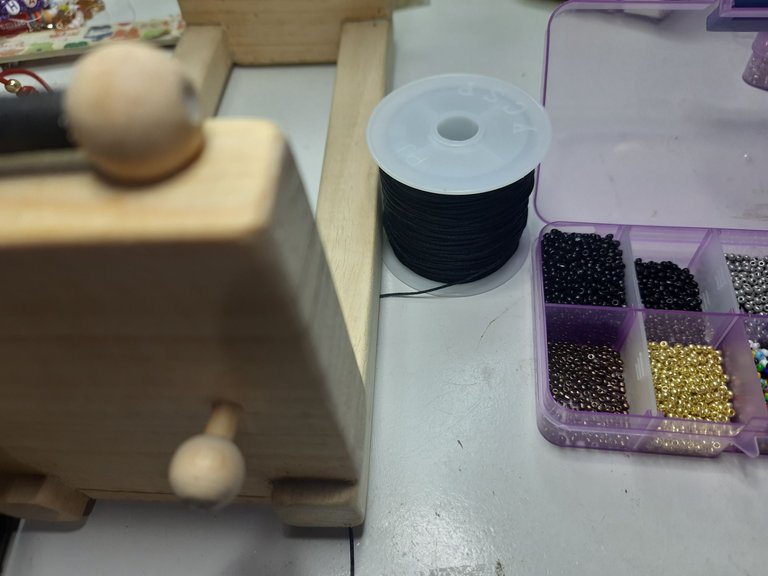
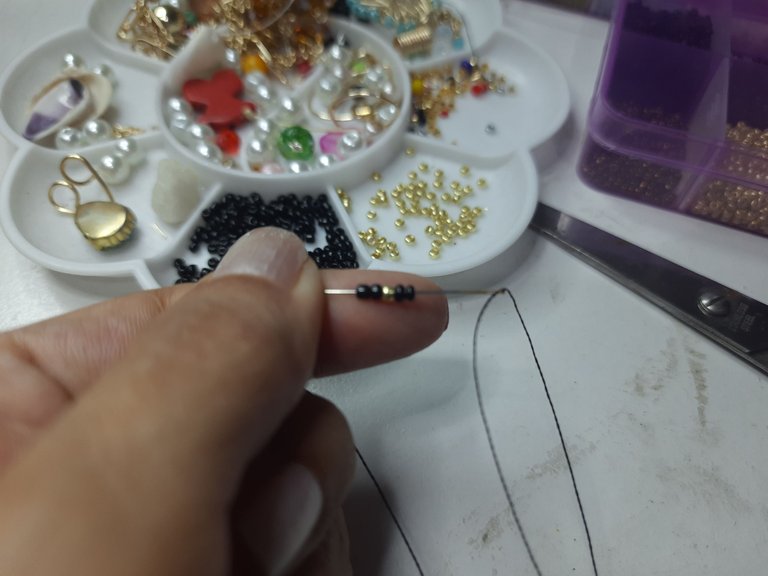
Materiales:
✅️ Hilo Chino 3 metrs
✅️ Mostacillas negras y doradas
✅️ Hilo Miyuki
✅️ Aguja miyuki
✅️ yesquero y Tijera.
Materials
✅️ Chinese thread 3 meters
✅️ Black and gold beads
✅️ Miyuki thread
✅️ Miyuki needle
✅️ tinder and scissors.
Paso a Paso / Step by Step
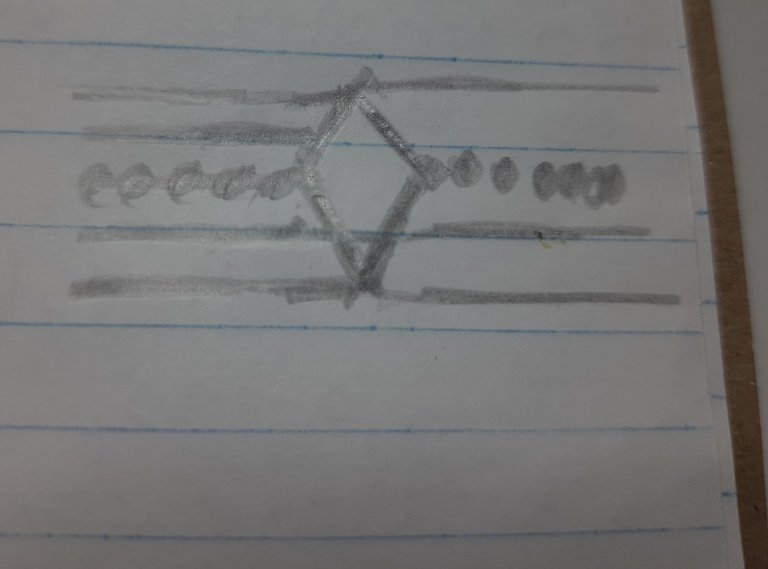
Lo primero que y se fue a dibujar el diseño que lo iba a colocar a la pulsera para luego traspasarlo..
The first thing he did was to draw the design that he was going to put on the bracelet and then transfer it to the bracelet.
 |  |
|---|
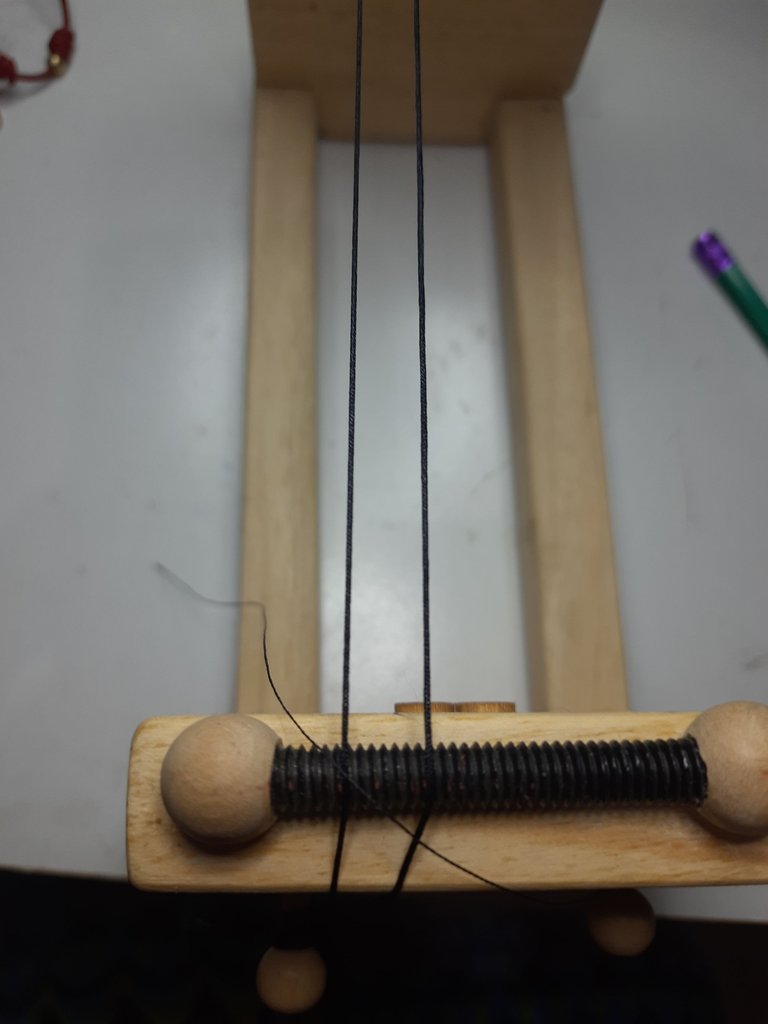
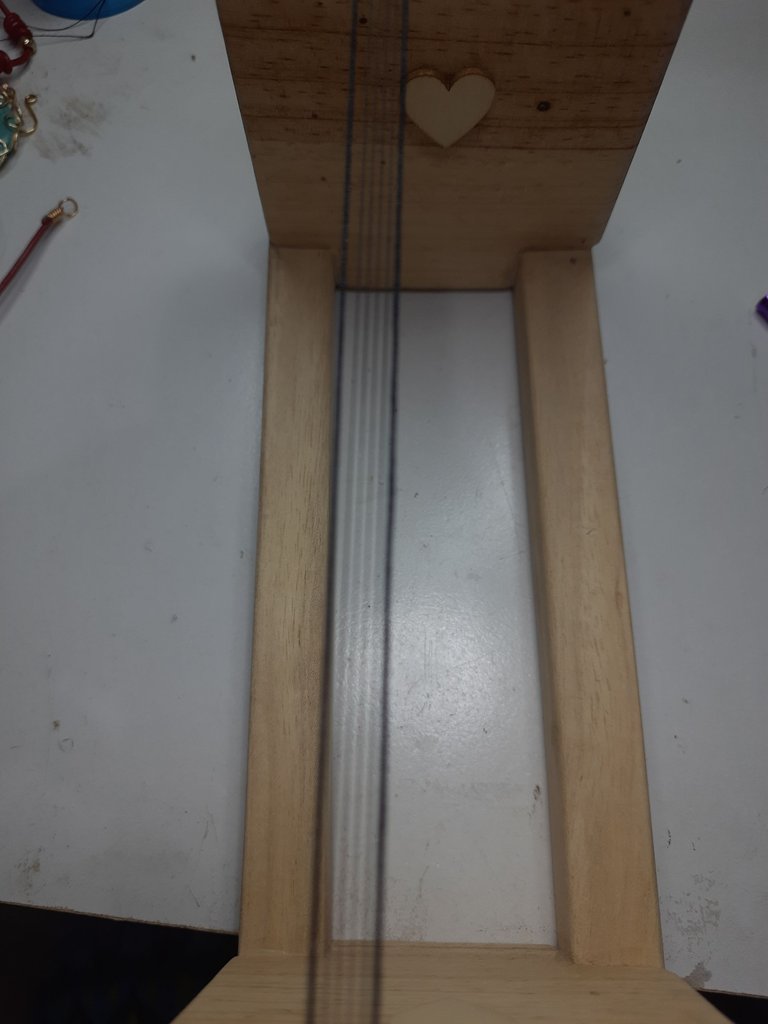
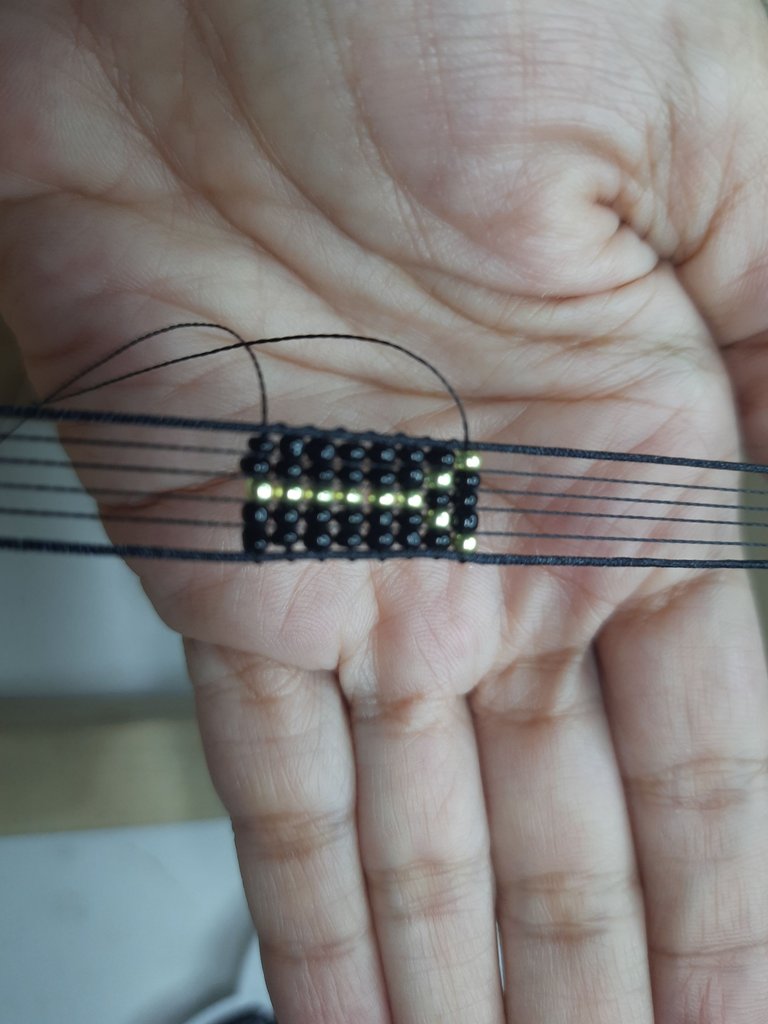
Comenzamos montando nuestros hilos en el telar, comenzamos con el hilo chino que serán nuestras hileras de los lados y luego nuestros hilos de miyuki colocaremos cuatro.
We start assembling our yarns on the loom, we start with the Chinese yarn which will be our side rows and then our miyuki yarns we will place four of them.
 |  |  |
|---|
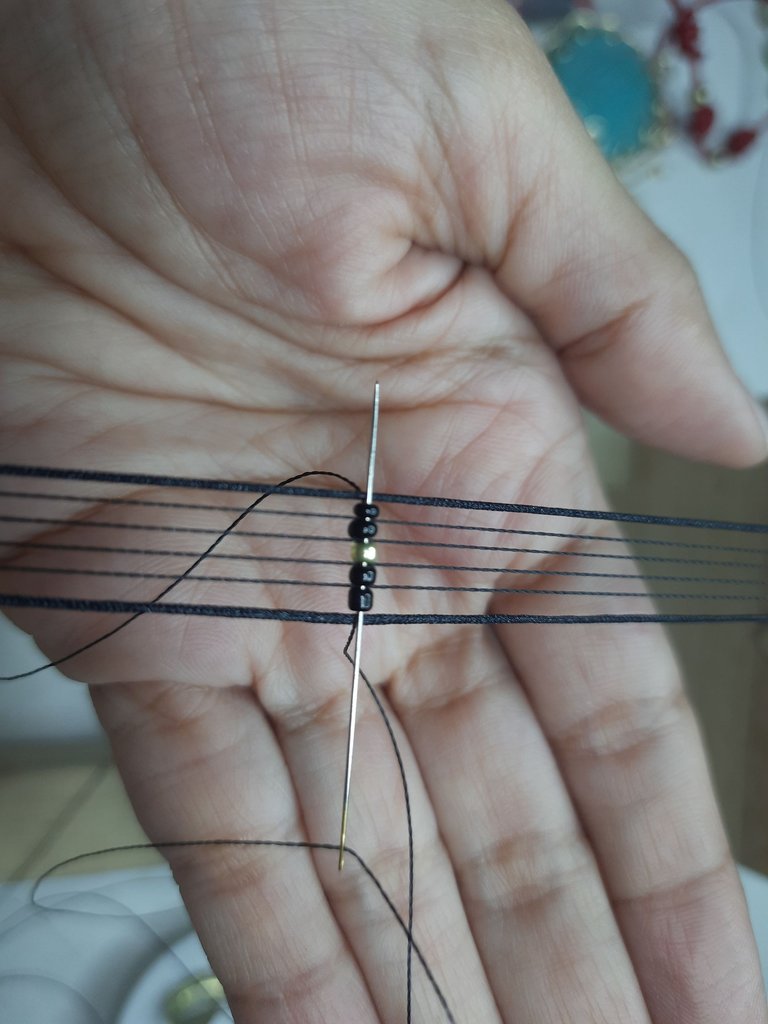
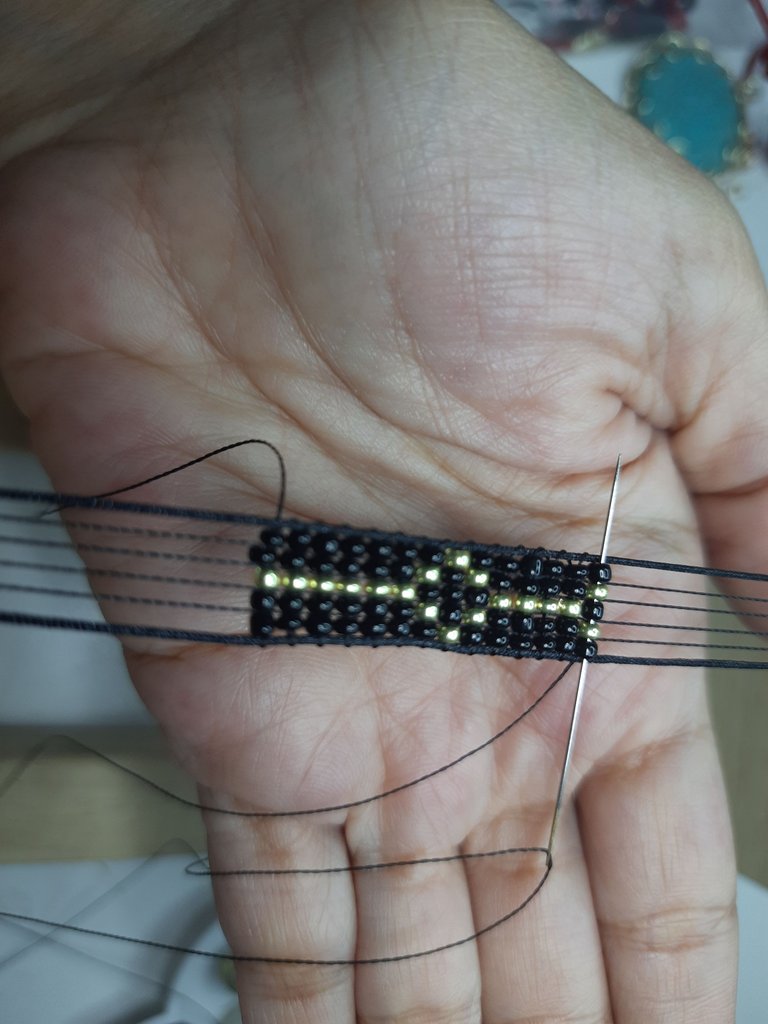
Insertaremos nuestra aguja con un metro y medio de hilo de miyuki que comenzaremos con mostacillas, dos negras una dorada y dos mostacillas negras más.
We will insert our needle with a meter and a half of miyuki thread that we will start with beads, two black beads, one gold bead and two more black beads.
 |  |  |
|---|
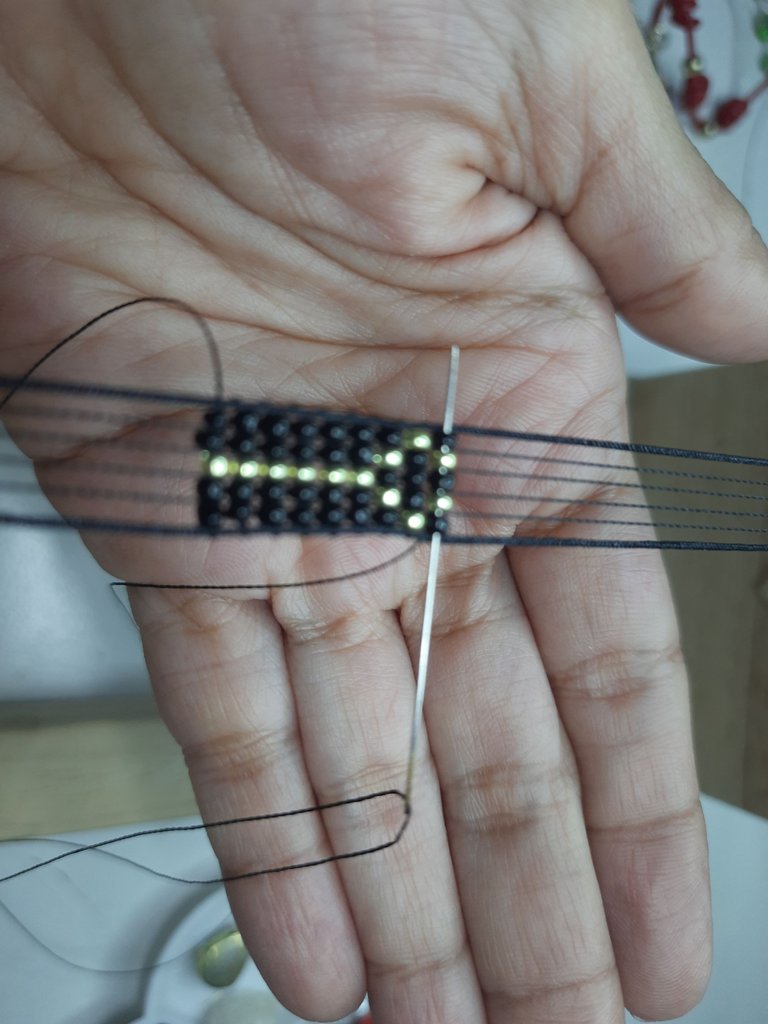
Vamos a seguir con el patrón de 2 negras 1 dorada y 2 negras hasta tener 6 iguales luego vendrá 1 negra 1 dorada 1 negra 1 dorada y 1 negra.
Siempre serán 5 mostacillas, luego ve dra 1 dorada 3 negras y 1 dorada. Luego viene nuevamente 1 negra, 1 dorada, 1 negra, 1 dorada y 1 negra.
We will continue with the pattern of 2 black, 1 gold and 2 black until we have 6 of the same, then we will have 1 black, 1 gold, 1 black, 1 gold and 1 black.
There will always be 5 beads, then go dra 1 gold, 3 black and 1 gold. Then comes again 1 black, 1 gold, 1 black, 1 gold and 1 black.
 |  |  |
|---|
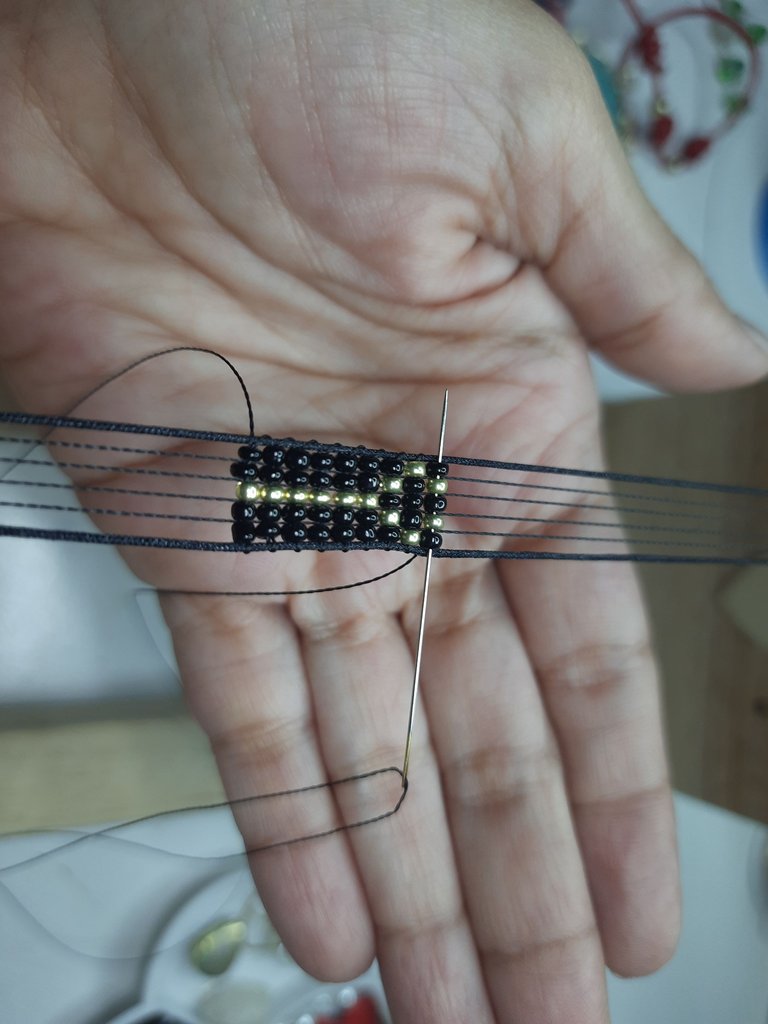
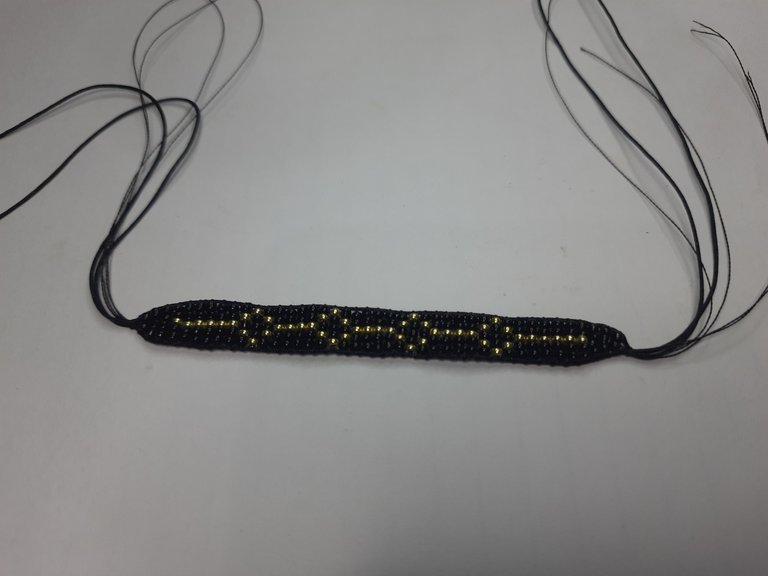
Vamos Después de terminar el primer rombo hacemos cuatro hileras de las primeras y volvemos a hacer el mismo rombo y así lo haremos cuatro veces seguidas.
After finishing the first rhombus, we make four rows of the first ones and make the same rhombus again, and we will do it four times in a row.
 |  |  |  |
|---|
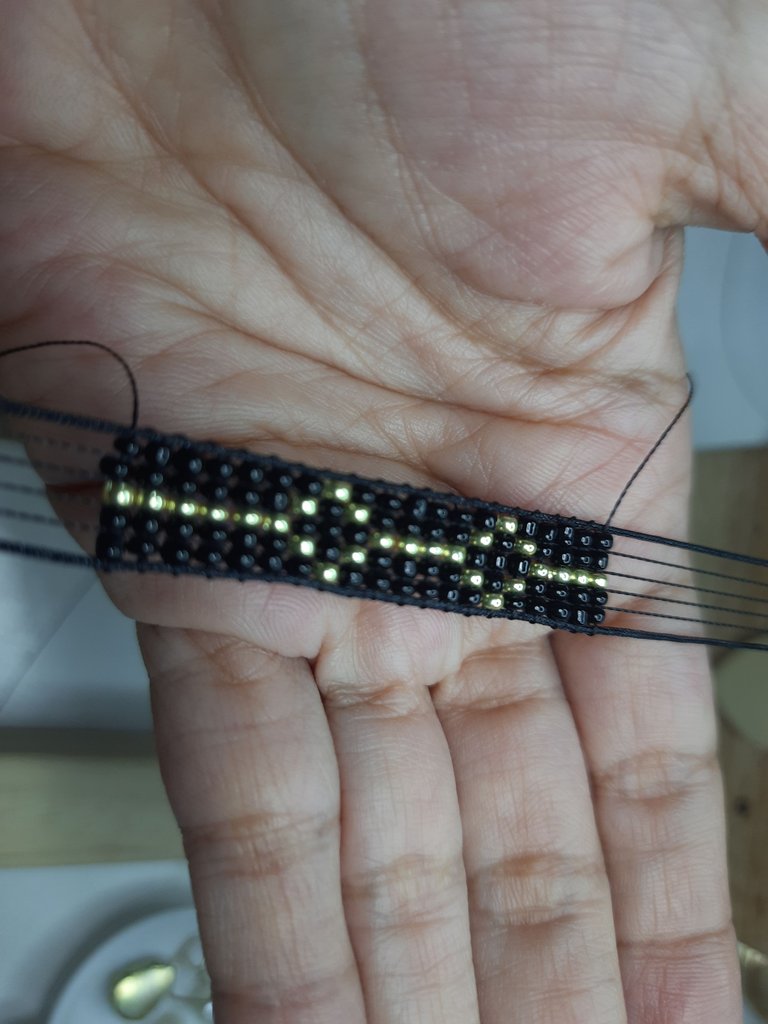
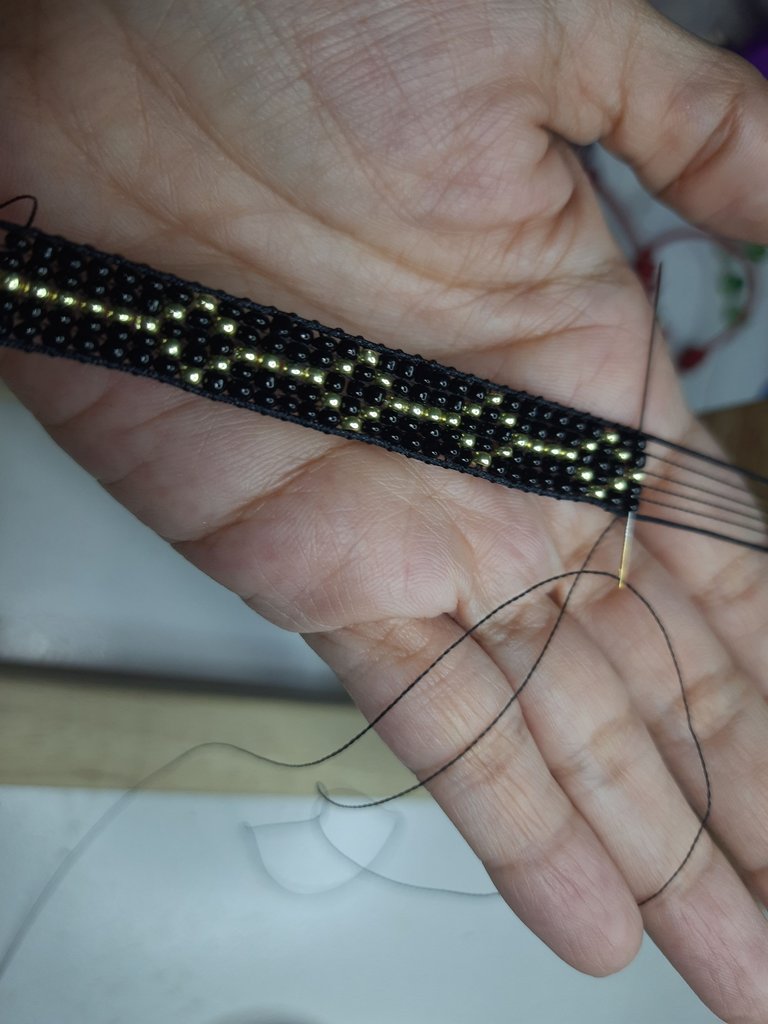
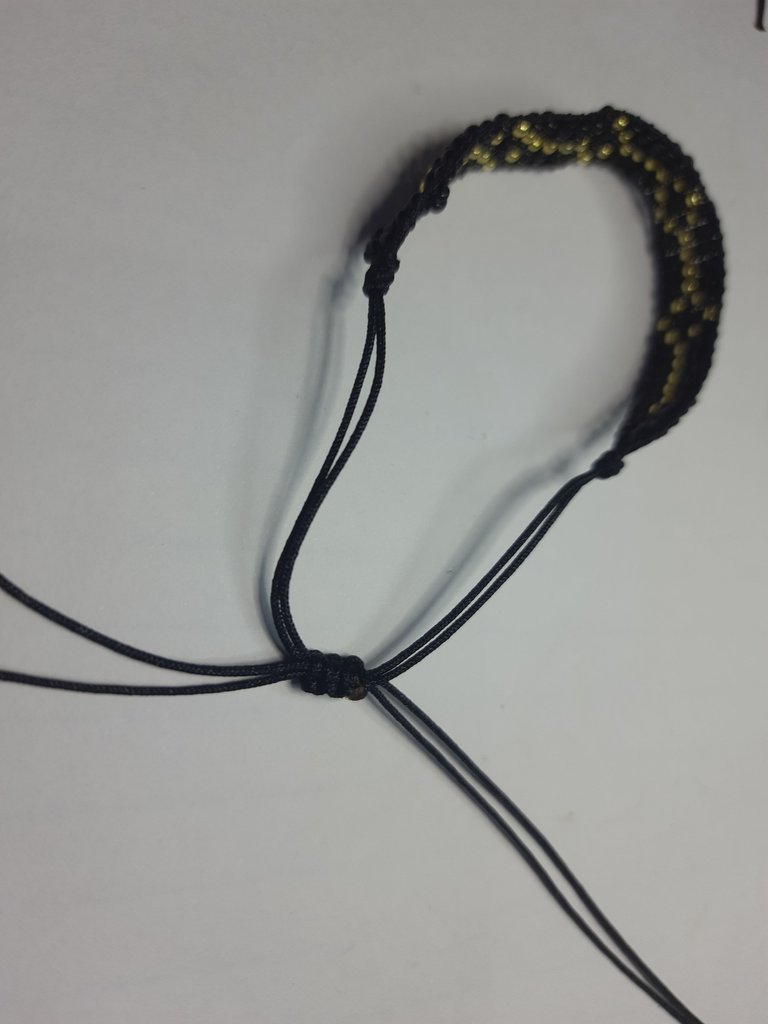
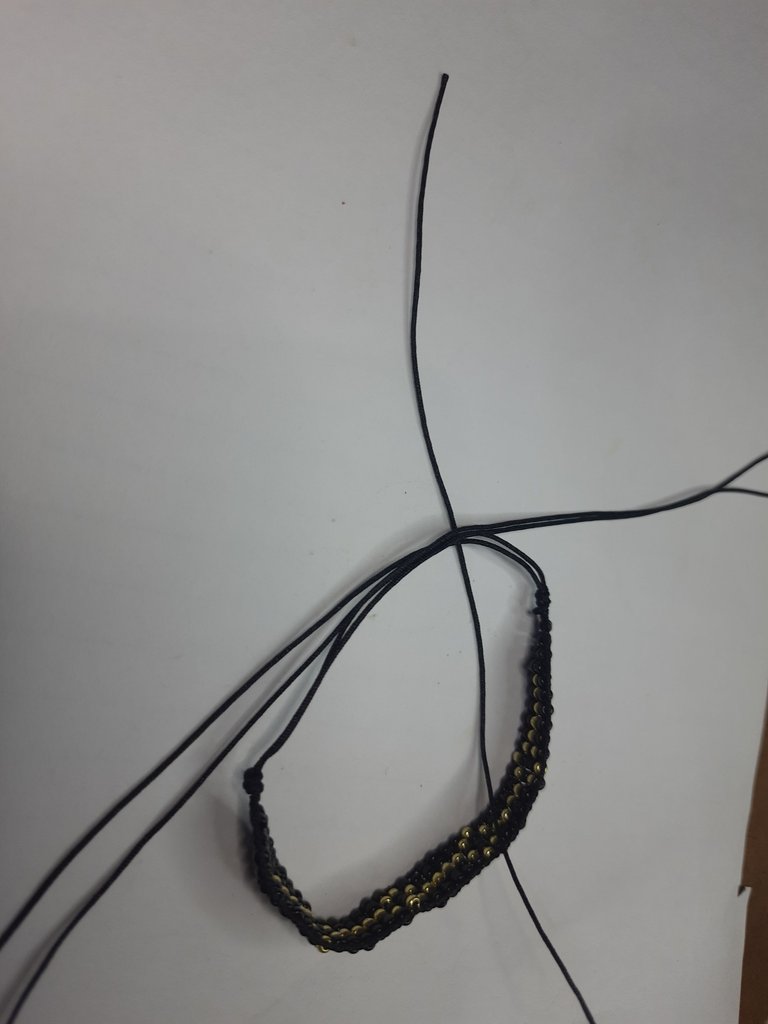
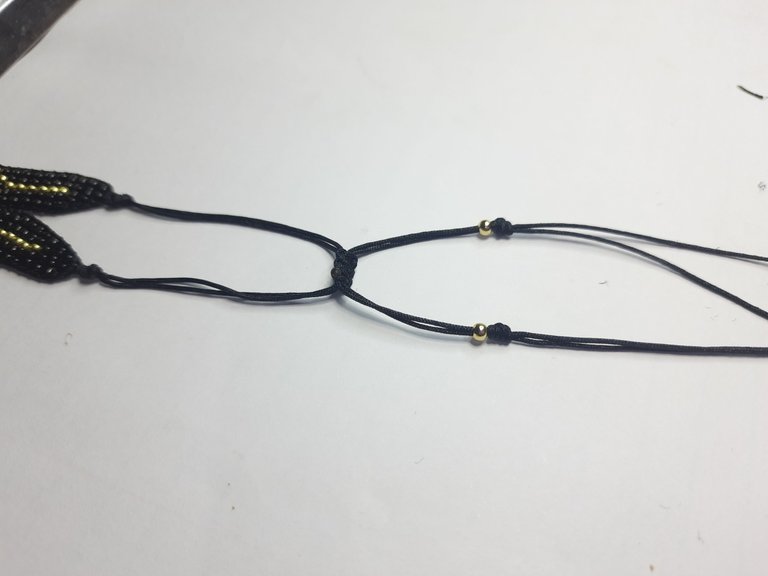
Por último cerraremos ambos lados de la pulsera haciendo reducción de 4, 3, y 2 cerramos y sacamos la pulsera de nuestro telar, luego vamos a cerrar la pulsera con un nudo plano para hacer una pulsera que abra y cierra, en las puntas colocamos unos balines dorados y cerraremos para terminar nuestra pulsera haciendo unos pequeños nudos en las puntas.
Finally we will close both sides of the bracelet making reduction of 4, 3, and 2 we close and take the bracelet out of our loom, then we will close the bracelet with a flat knot to make a bracelet that opens and closes, in the ends we place some golden balls and we will close to finish our bracelet making some small knots in the ends.
Resultado: / Result:
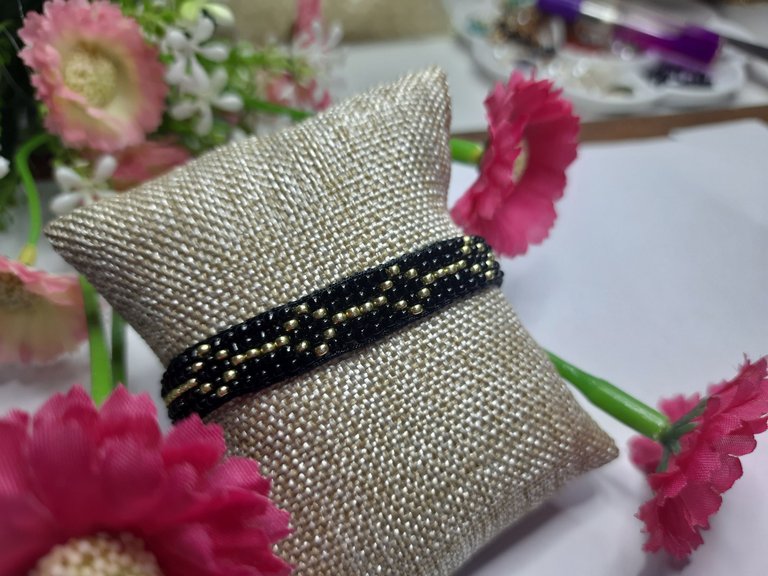
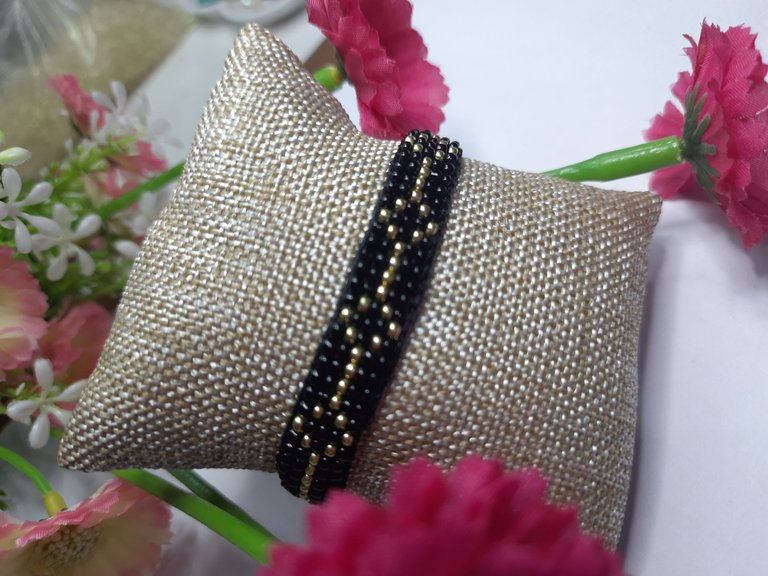
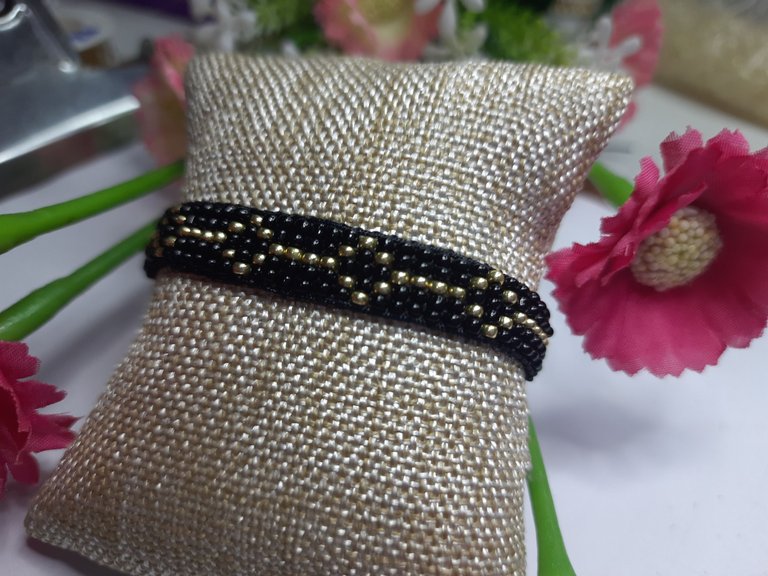
Así ha quedado lista nuestra pulsera dedicada a nuestro fanart nomos y su traje, y así ha quedado nuestro sencillo tutorial, espero que sea de su agrado, tanto como me ha gustado a mi esta pequeña y hermosa creación y mi participación al concurso de arte de @Splinterlands
Gracias por estar aquí y ser parte de mi blog y de la comunidad @jewelry 😉
So is ready our bracelet dedicated to our fanart nomos and his costume, and so is our simple tutorial, I hope you like it, as much as I liked this beautiful little creation and my participation in the art contest @Splinterlands
Thank you for being here and being part of my blog and the @jewelry community 😉.

Les invito a suscribirse a la comunidad de @Jewelry y poder así mostrar todas sus creaciones de accesorios, tanto de adultos como de niños; nos encanta ver y apoyar a todos los artesanos, manualistas y orfebres, puedes crear accesorios para damas, caballeros y niños, así que tu creatividad es el límite 😉
I invite you to subscribe to the @Jewelry community to showcase all your accessory creations for both adults and children; we love to see and support all the artisans, crafters and goldsmiths, you can create accessories for ladies, gents and kids, so your creativity is the limit 😉.
"Los accesorios tienen el poder de hacer sentir a la mujer única y especial"
Accessories have the power to make a woman feel unique and special"
Fotos principal editada con Canva.
Separadores de mi Autoría
Fotos de mi Autoría derechos reservados
Cámara: Samsung M31
Traducido con www.DeepL.com/Translator (versión gratuita)
Photos edited with Canva
Separators by me
Photos by me Author's rights reserved
Camera: Samsung M31
Translated with www.DeepL.com/Translator (free version)


Nice hand crafted work @yolimarag friend!!!
!discovery 28
!VSC
!PIZZA
@jlinaresp has sent VSC to @yolimarag
This post was rewarded with 0.1 VSC to support your work.
Join our photography communityVisual Shots
Check here to view or trade VSC Tokens
Be part of our Curation Trail
@jlinaresp ha enviado VSC a @yolimarag
Éste post fue recompensado con 0.1 VSC para apoyar tu trabajo.
Únete a nuestra comunidad de fotografía Visual Shots
Consulte aquí para ver o intercambiar VSC Tokens
Se parte de nuestro Trail de Curación
This post was shared and voted inside the discord by the curators team of discovery-it
Join our Community and follow our Curation Trail
Discovery-it is also a Witness, vote for us here
Delegate to us for passive income. Check our 80% fee-back Program
$PIZZA slices delivered:
@jlinaresp(12/15) tipped @yolimarag
Se ve muy linda, gracias por compartir el tutorial 😊
Se ve muy hermoso amiga ❤️
Gracias amiga me alegra que te guste 😊
Cómo siempre realizaste un trabajo muy bonito y elegante, me gustó bastante, saluditos 🤗
Gracias amiga a mi también me gusto mucho, como dices se ve elegante los colores, gracias por pasar 😉
This must have really taken your time. Its very very beautiful and unique dear. Weldone
Wowww amiga lo que me había perdido ver pero finalmente estoy aquí, que brasalete tan precioso, lo ame,esa tecnica que empleaste me encanta.
Grandioso fantart. Éxitos en el concurso...
Quedó muy hermosa, y la presentación final, genial!
Gracias amiga por tu apreciación ❤️
Quedó muy hermoso, espero ver más 😍😍