Elanor Bravefoot: Boost Battle Efficiency Zero-Mana Advantage
Hello! Splinterlands community. I'm @zactian. I'll write about my lineup strategy based on the rule set given and choosing the water element sharing tips on how to win the game with this element. I'll be using Elanor Bravefoot because of how useful it comes especially in low mana cap rule sets this card only costs 0 mana and it is a Neutral card that I can use in any element combo. I'll be sharing a certain battle strategy with Elanor Bravefoot with a water element combo, explaining why I chose this card, and how effective this rebellion card is in the battle with a certain battle strategy combo.
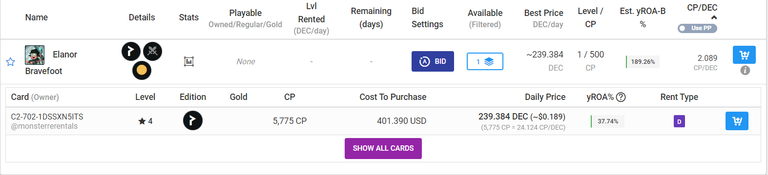
At the moment, I've only rented a level 2 card due to its high price in the market, but this level is sufficient to form a solid battle strategy with any element. As of September 1, 11:34 AM Philippine time, there was only one card available for rent on PeakMonster, and I was fortunate to secure it for 54 Dark Energy Crystals at level 2.
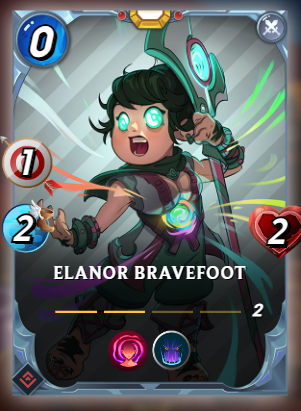
Elanor Bravefoot, a new card from Splinterlands' Rebellion set, brings unique value to battles with her ranged attack and zero mana cost, making her incredibly useful in specific strategies and rule sets. Her zero mana cost allows you to add her to your lineup without using any resources, providing a free extra attacker while preserving your mana for more powerful cards. She's particularly effective in low-mana battles, filling lineup gaps, and contributing damage without affecting your overall mana budget. Elanor shines in rule sets like "Little League," where only low-mana cards are allowed, or "No Abilities," as her presence offers a free offensive boost. While her attack isn't overwhelming, her flexibility and ability to fit into almost any lineup make her a valuable addition, especially in matches with tight mana caps.

INTO THE BATTLE:
Rule Set

- All units will gain the ability of Blasts.
- All healing abilities won't be able to be used in this battle.
Recommended summoner to use with the Elanor Bravefoot for this match:
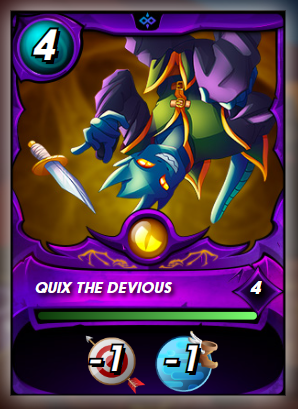
In this battle, I chose Quix the Devious as my summoner because I was planning to deploy Vruz and utilize a Sneaky strategy to target the backline of my opponent's team. I assumed that the opposing player would likely focus on using ranged units, especially with the Explosive Weaponry rule set in play, which made Quix an ideal choice due to his ability to reduce both ranged attack power and speed. However, I didn’t anticipate that my Vruz would expire before this match, which disrupted my original strategy. Despite this setback, I’ll still be using Quix as my summoner, as its debuffs on ranged units remain highly valuable in countering the expected composition from my opponent. I'll need to adjust my lineup to make the best use of Quix’s abilities, even without Vruz, and still use sneak strategy. It is also a good combo with Explosive Weaponry for extra damage.
Note: I only have limited cards but they are useful in some rule sets and I will try my best to win with existing cards. So if you want a high chance of winning, I advise you to rent or buy useful or stronger cards for most rule sets.
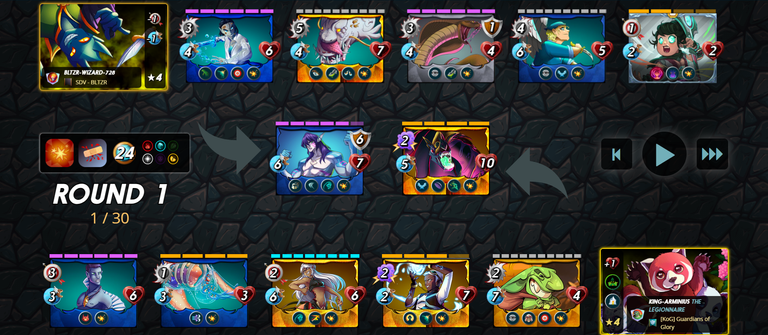
My Simple Plan Lineup
First Position - Noa the Just
I chose Noa the Just for the first position because of his high health and tank capabilities. As my frontline protector, he can absorb damage and keep my more vulnerable units safe because of useful abilities Dodge and Backfire abilities once the opponent's attack misses the target will receive 2 melee damage. The opponent prioritizes to attack this unit my sneak melee units also synergize well with my strategy, allowing me to potentially outpace my opponent’s ranged attackers. With the Explosive Weaponry rule in play, having a sturdy tank at the front helps to minimize damage taken from incoming attacks.
Second Position - Tide Biter
Tide Biter is my choice for the second position due to his high damage output and the ability to protect from blasts ability because of Reflection Sheild. This pairs nicely with my plan to take advantage of the opponent's likely focus on ranged units. By placing him behind Noa, Tide Biter can effectively capitalize on openings created by my frontline, targeting weakened enemies in the back row and contributing to my overall damage strategy.
Third Position - Deeplurker
I selected Deeplurker for the third position because of his Opportunity ability to attack an opponent with smaller health and with useful abilities Poison which can apply poison to the target by 50% chance, and Demoralize which can reduce opponent melee units by 1. This complements my overall sneak strategy, allowing me to apply pressure on my opponent’s backline. Its potential for high damage output makes it a valuable asset, especially in a match where the opponent may prioritize ranged units. By utilizing Deeplurker, I can quickly eliminate key threats and disrupt my opponent's strategy.
Fourth Position - Uraeus
Uraeus is positioned fourth because of his impressive damage with applying poison target. It can effectively target both backline units, depending on the situation. With the ability to attack in a single round with hopefully apply poison, Uraeus can significantly contribute to my sneak strategy. This unit presence also ensures that I have a quick hitter ready to respond to any backline threats, especially if my opponent focuses heavily on ranged attacks.
Fifth Position - Pelacor Bandit
I chose Pelacor Bandit for the fifth position due to his high speed and damage and ability to deal consistent damage. This role here is to highly defeat the opponent's target backline to overwhelm with 4 melee damage and a useful Flying ability which can have a chance to miss incoming sneak attacks by 25% with 6-speed stats that will likely increase the chance, particularly those that may have survived the initial wave of attacks. This speed allows this unit to strike first, which can be crucial in a battle where timing is essential, especially against slower units.
Last Position - Elanor Bravefoot
Finally, I placed Elanor Bravefoot in the last position because of her zero mana cost and ranged attack capabilities. Even without Vruz, she can still add valuable damage to my lineup without costing me any mana. Her ability to attack from the backline while remaining safe from melee threats is a crucial part of my overall strategy. With her positioned last, I can maximize her effectiveness while supporting the other units in the lineup, especially as they engage the opponent's frontlines.
This simple lineup is designed to maximize the synergy between speed and damage output. By carefully selecting units with abilities that enhance speed and deal significant damage, I increase my chances of victory in the Explosive Weaponry rule set. Each unit plays a strategic role in maintaining offensive damage while protecting the team from Blast damage, ensuring that my lineup remains strong throughout the battle.
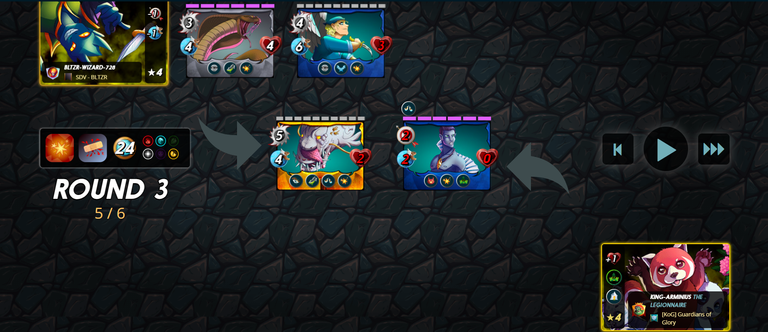
Analyzing the Battle
In this battle, the opponent used Lily Shieldpaw, a strong counter to my Sneak Strategy. This summoner grants its allies Camouflage and Triage, providing crucial healing to the backline each round. The opponent’s strategy was clearly focused on healing the first position while only targeting the Void Dragon as their tank. Void Dragon was well-suited for the role, with abilities like Flying, Void, and Phase giving it endurance and increasing the chance of dodging attacks.
Their lineup also included Vruz, which boosted the stats of both Oshuur Constantia and Void Dragon by 1, making them stronger. Oshuur Constantia played a supportive role, offering Heal and Resurrect, making the team even more durable. The opponent prioritized using Magic and Ranged attacks, whereas my lineup had the edge in melee damage and speed. Overall, their positioning was excellent for maximizing the abilities of their units and summoner, making for a formidable opponent.
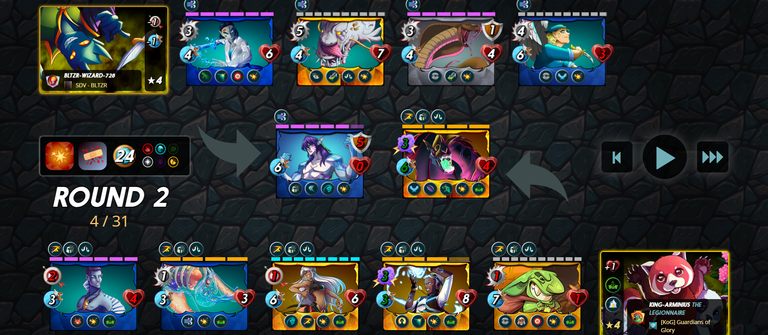
In the early rounds, Vruz boosted both Oshuur Constantia and Void Dragon, which made them even tougher to handle. Vruz was taken down quickly in the first round due to its low health, but Oshuur Constantia immediately resurrected it, allowing it to return and continue supporting the team. Noa the Just quickly eliminated Vruz again, but the relentless magic damage from Oshuur Constantia and Void Dragon began to overwhelm Noa.
Ultimately, my lineup's speed and melee damage proved to be the deciding factor in this battle, as my Sneak Strategy was able to break through the opponent’s defenses. However, if my attacks on Void Dragon had failed, the outcome might have been very different, and the opponent's overpowering magic could have led to my defeat.
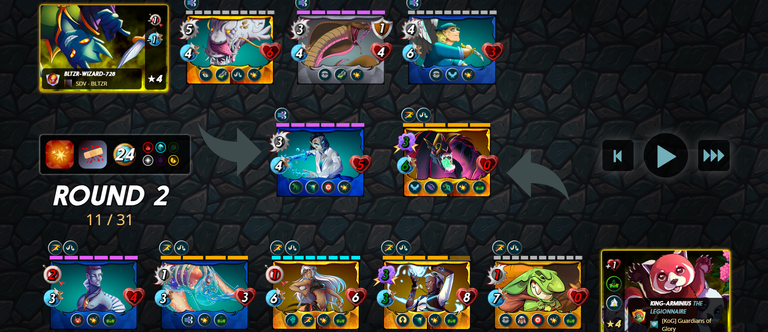
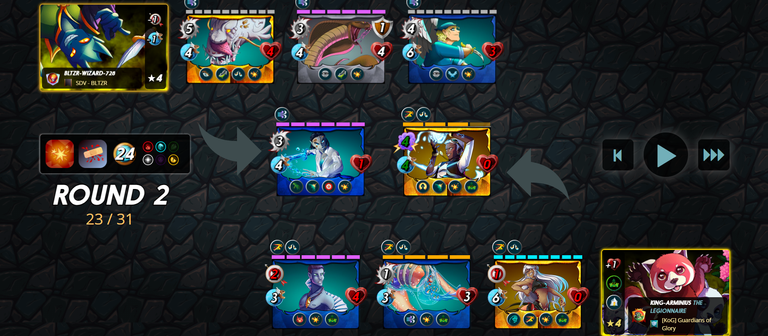
As the battle continued, I managed to gain momentum, especially with my Pelacor Bandit, who successfully took out the opponent’s Void Dragon, Vruz, and eventually other units as well. A key factor in my success was avoiding the potential misses from Void Dragon's Flying ability, as missing those attacks could have tipped the battle in the opponent's favor. Had I missed more often, the combination of magic attacks from Void Dragon and Oshuur Constantia could have easily overpowered my team.
As the battle progressed I was able to take turns in the match with my Pelacor Bandit defeating the opponent Void Dragon, Vruz, and as follows other units defeated. If my attacks were missed by Void Dragon then I might have high chance defeated this match because of the overpowered magic attacks of Void Dragon and Oshuur Constantia.
Big part of Elanor Bravefoot
Elanor Bravefoot in this battle proved to be a valuable and effective asset, despite not being the best of the best combo of the strategy. With the zero mana cost and ranged attack, Elanor contributed to the overall damage output without depleting the team's mana pool. Positioned safely in the backline, she was able to consistently fire off ranged attacks, providing extra offensive support while the main units handled the frontline combat.
Elanor's key role was filling a crucial slot in the lineup without the need to sacrifice stronger cards. Its ability to extra damage away at the opponent’s health, especially in a battle where every bit of damage mattered because of Explosive Weaponry, was a silent but significant contribution. Though not the star of the match, Elanor Bravefoot served as a reliable, low-cost addition to the team, complementing the strategy with steady ranged support and making a useful difference in the overall outcome.

Big Thanks! for supporting me, being here, and coming this far. I'm hoping this can assist you with some of your battles. I suggest using speed to increase your chances of winning battles since it increases your ability to block incoming strikes and launch first attacks.
Credits:
The first Image is Edited Design photo Splinterlands Modern League using PicsArt
Screenshot In-game splinterlands
Congratulations @zactian!
You raised your level and are now a Minnow!
Check out our last posts:
Thanks for sharing! - @yonilkar
